
Introduction
In recent times, the demand for at-home beauty treatments has surged, and one of the most sought-after services is waxing. Waxing offers a convenient way to achieve smooth and hair-free skin without the need to visit a salon. In this comprehensive guide, we will walk you through the process of performing a cheap waxing service at home, covering everything from preparation to aftercare.
Understanding the Basics of Waxing
Before diving into the world of at-home waxing, it’s crucial to understand the basics of the process. Waxing involves the application of a warm or cold wax to the skin, which adheres to the hair. As the wax is pulled off, it removes the hair from the root, resulting in longer-lasting smoothness compared to shaving.
Gather Your Supplies
To ensure a successful at-home waxing session, gather all the necessary supplies beforehand. This includes:
a. Waxing kit: Choose a reliable waxing kit that suits your preferences—options include hard wax, soft wax, or pre-made wax strips. b. Applicator sticks or strips: Depending on the type of wax, you’ll need either applicator sticks for spreading hard wax or strips for soft wax. c. Pre-wax cleanser: Use a pre-wax cleanser to remove any oils or lotions from the skin, ensuring better adhesion of the wax. d. Wax warmer: If you’re using hard wax, a wax warmer is essential to melt the wax to the right consistency. e. Post-wax oil or lotion: Soothe the skin after waxing with a gentle post-wax oil or lotion to reduce redness and irritation.
Preparing Your Skin
Properly preparing your skin is crucial for a successful waxing session. Follow these steps:
a. Cleanse: Begin by cleansing the area to be waxed using a mild soap or gentle cleanser. b. Exfoliate: Use a gentle exfoliator to remove dead skin cells, allowing the wax to adhere better and reducing the risk of ingrown hairs. c. Dry thoroughly: Ensure the skin is completely dry before applying any wax. Moisture can prevent the wax from adhering properly.
Choosing the Right Wax
Selecting the right type of wax is essential for a successful at-home waxing experience. There are three main types:
a. Hard wax: Ideal for sensitive areas like the face, underarms, and bikini line. It hardens on its own and is removed without the need for strips. b. Soft wax: Suitable for larger areas like legs and arms. Applied thinly and removed with cloth strips. c. Wax strips: Pre-made strips come with wax already applied, making them convenient for quick and easy use.
Consider your preferences, pain tolerance, and the targeted body area when choosing the type of wax for your at-home waxing session.
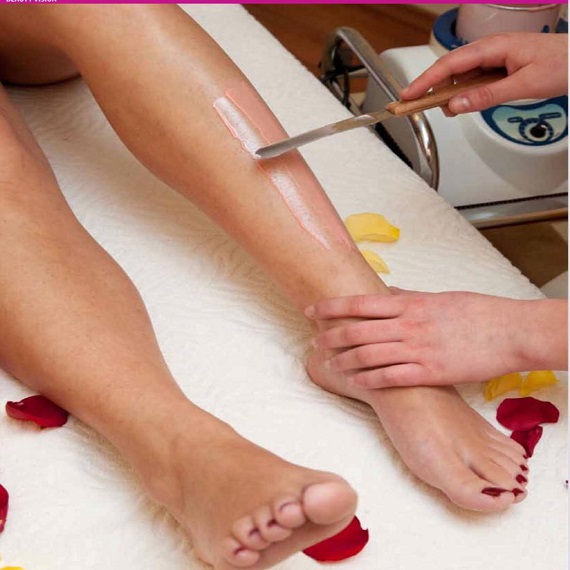
Applying the Wax
Follow these general steps for applying wax, whether using hard wax, soft wax, or wax strips:
a. Heat the wax: If using hard wax, melt it in the wax warmer until it reaches a smooth, spreadable consistency. b. Test the temperature: Before applying the wax to a larger area, perform a small patch test on your wrist to ensure the wax is not too hot. c. Apply the wax: Using an applicator stick or the provided tool, apply the wax in the direction of hair growth. d. Smooth on strips: If using soft wax or wax strips, press the cloth strip onto the applied wax, making sure it adheres well. e. Pull off quickly: Pull the wax or strip off swiftly against the direction of hair growth to minimize discomfort.
Post-Wax Care
Once you’ve completed the waxing process, it’s essential to take care of your skin to minimize irritation and promote healing:
a. Remove residue: Use any provided post-wax oil or cleanser to remove any remaining wax residue. b. Soothe with a cool compress: Apply a cool compress to the waxed area to reduce redness and soothe the skin. c. Avoid heat: Steer clear of hot baths, saunas, or direct sunlight for at least 24 hours after waxing to prevent further irritation. d. Moisturize: Hydrate your skin with a fragrance-free, gentle moisturizer to maintain smoothness.
Troubleshooting Common Issues
Despite careful preparation, you may encounter some common issues during at-home waxing. Here’s how to troubleshoot them:
a. Ingrown hairs: Regular exfoliation can help prevent ingrown hairs. If you notice any, gently exfoliate the area and apply an anti-ingrown hair serum. b. Redness and irritation: Apply a soothing aloe vera gel or a post-wax lotion to calm redness and irritation. c. Uneven wax application: Take your time during the application process, ensuring an even layer of wax for optimal results.
Conclusion
Embarking on an best at-home waxing service in Bahawalpur journey can be a rewarding experience when armed with the right knowledge and tools. From understanding the basics to choosing the right wax and following proper aftercare, this guide covers all aspects of a successful waxing service at home. Enjoy the luxury of smooth, hair-free skin without the hassle of salon visits by mastering the art of at-home waxing.